


The Lathe
The lathe is a Quantum D210x400, very similar to the Lathemaster 8x14 just a little bit bigger and some finishing differences.
I have to say that the lathe is never as clean as in these pictures. I wanted to show it to you with all the glory and I did clean it for the pictures. I am so proud of this lathe that it wouldn't be fair to show it as dirty as it usually is.

The manufacturer is Quantum-Optimum Maschinen, it is a german manufacturer and they assure that the lathe is manufactured in germany… but I believe that they just mean that some part of the manufacturing is done in Germany, probably quality inspection.
Made in germany or not, the truth is that I am veeery glad with this machine. It is a pleasure to push it to it's limits. Normally I will just get scared before the machine actually hesitates to do it's job, and I always find that I can make that extra-heavy cut or maybe a specially precise cut.
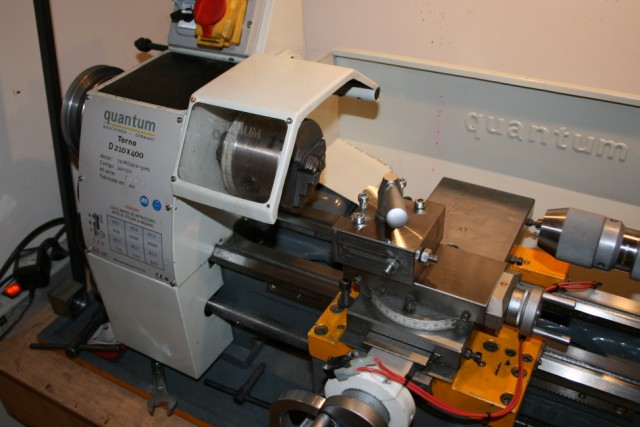
It came with a chipguard which is not really useful since it is so short and placed so close to the chuck that it doesnt actually guard from any chips. In fact it interferes with the cutting tools so frequently, that I always set it away. But I have to admit that it gives a nice look to the lathe when it is placed down…

It is belt driven through a Vee belt which sometimes slips a little bit, mostly when I take very aggresive cuts on big diameters and low speeds like when I made the Faceplate. But for speeds higher than 420 RPM there is no problem with that.
I have considered many times to upgrade it with an inverter and a three-phase motor. But cost has been setting me away from that option. Mostly for ease of changing speeds, less vibrations and smoother operation .Another nice feature would be that with the inverter the PC can control spindle speed, very helpful for threading and machining with constant linear speed. That is definitely one upgrade that will come.

On the right you can see, under the belt pulley, the gears for the longitudinal feedscrew, as usual. I don't know if every lathe is so messy to change these gears, but this one really is. The gears are press-fit on the bushing, and in general the setup is a bit tedious.
A view of the headstock, with model number and everything else.


Here you can see the bed ways and the tailstock, I have to make one of those Tailstock cam locks one of these days, although I have gotten pretty agile with the flat wrench.
Additions/Modifications
CNC
Not completed yet, sorry!
Quick Change Toolpost
Ever since I started to work with this lathe I missed a way to comfortably adjust tool height. I just couldn't believe that people used shims and had to wiggle with the tool like I had to do to get it on the correct height.
But when I upgraded the machine to CNC, the need for a QCTP was even bigger. Either I built an automatic tool changer (which seemed very complicated) or I built a QCTP in order to support reliable manual tool change.

So, after doing my homework and searching the web I decided that the main fact I wanted to achieve was repeatibility, ie: I wanted to change tools and have the confidence that whenever I inserted tool no.1 it was in the same position within a decent tolerance. In order to achieve this I discarded piston tipe toolposts and went with a wedge type one.
I found the plans in metalwebnews, and decided to build it. I had a hard time milling the dovetails, since i chose a tool steel that is work-hardening, that made milling a bit tough, but most operations were done in the lathe for the toolholder.
As a result of trying to mill such a hard steel, my dovetail cutter got dull on its 3rd dovetail…. I finished that one and the fourth dovetail as I could but the cutter had given all it could. How can it be that a cutter that costs €35.00 doesn't achieve to make even four dovetails? a bad machinist, I guess. But it made me think about how easy milling cutters lose their sharp edge, it's so frustrating. That is what made me start to think that I needed a T&C Grinder.
I made a carbide tipped dovetail cutter(if you make one, it's very important to make sure that you provide the correct clearance angle for the insert), and went along with it to make the toolblocks. It performs acceptably, but since the cut is made with all the side of the insert at the same time, it tends to generate many vibrations, so you have to keep an eye on the feedrate.
Quick and Dirty dividing
Well, I actually shouldn't be showing this. It is not something I'm very proud of, but it's such a simple solution to a common problem that I had to show it. Besides, it can be done with much better aesthetics, so the solution itself is not bad, just my implementation that is very improvable.
One of the first jobs I did with the lathe was a round to hexagonal shaft adapter. I didn't have a mill neither a dividing head. So i planned to machine the round adapter and mark the edges of the hexagonal sides in order to carefully grind them. OK, that's fine, but I had to mark out the edges with a rough accuracy, but with some accuracy. My solution was as simple as printing a strip of paper graduated in degrees, and with a length equal to the perimeter of my chuck. I had to fine adjust the length of the printed strip of paper, but it worked very well. I also installed something to do as a pointer and thats it (the pointer is the ruler, and yes, my welding skills need much improvement).


It worked so well, that later I used it to mark the graduations on a depth stop for my drill press. I made 100 graduations with such a fixture and it went out pretty decently.


Post preview:
Close preview